Draw Percentage Circle in Android
Canvas animations: Unproblematic Circumvolve Progress View on Android

The Android Class form lets us draw anything* that we can imagine using bones shapes, paths, and bitmaps. The Sail API it's really large 🤯 and daunting at commencement sight. Here nosotros're but going to scratch the surface to create our simple animation.
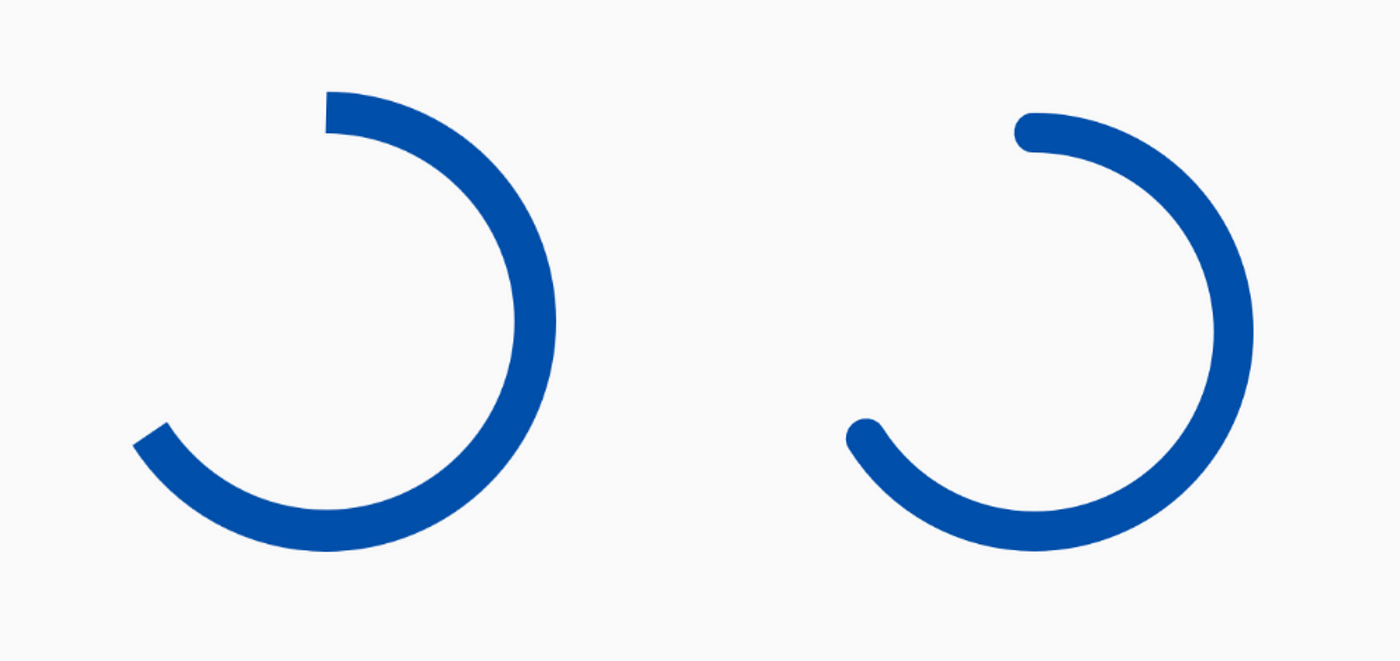
The blitheness
Note
This article will exist roofing each stride for conceiving the animation but I exercise recommend reading a bit farther: Getting started with drawing on the Android Sail past Rebecca Franks information technology's a cracking read 🤓.
Ok, lets started!
Y'all may know the drill. Create a new project, with an empty activity, and create a class that extends from the AndroidView class:
          class CircularProgressView(
            context: Context?,
            attrs: AttributeSet?
) : View(context, attrs) {}
And now we accept our ready to draw on view! 🙌
What do we demand to draw?
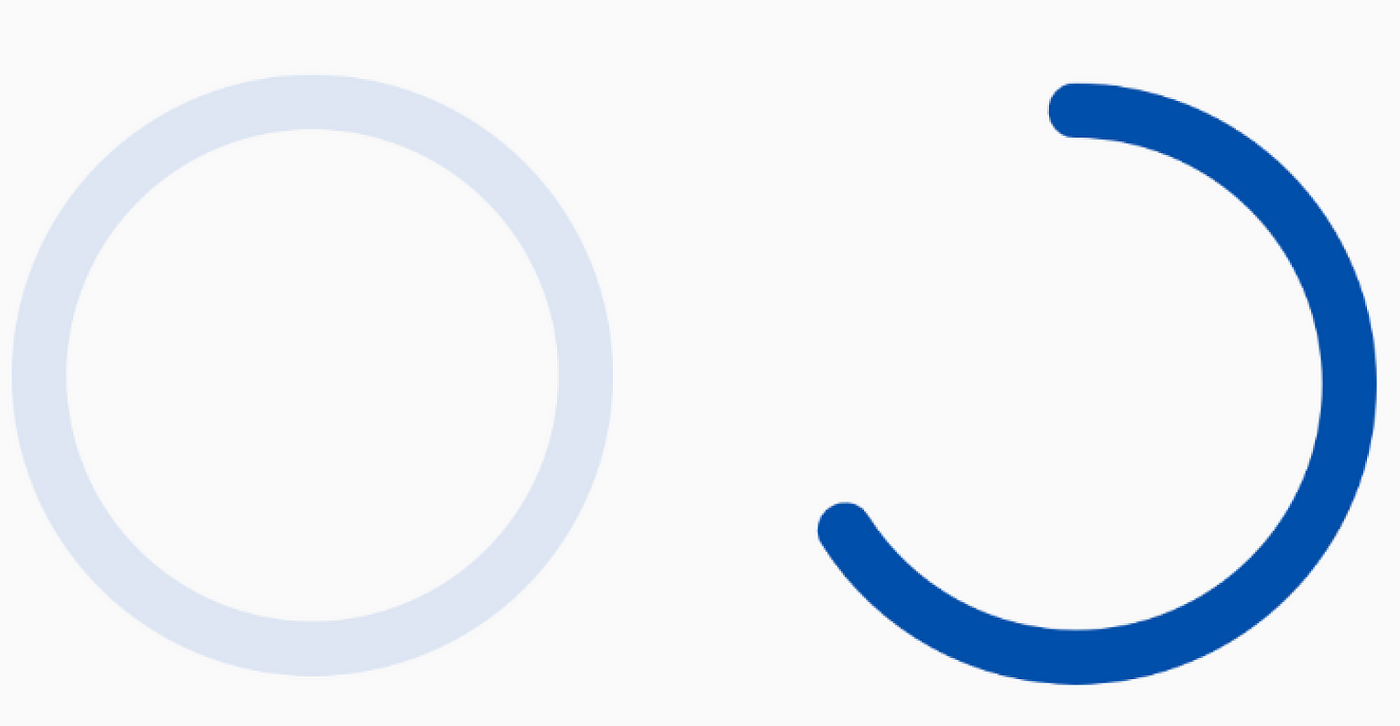
In order to achieve this blitheness we first have to know how to draw the circles, we need 1 to be the background and another arc to fill the current progress.
And how can we draw it?
Each view comes with a onDraw method override which provides usa with a Sail instance for us to starting time cartoon with. To achieve our animation we need to create draw two arcs using the canvass example, one arc for the background, and one of the tops, which volition be the one to be blithe. For that, we'll demand to use the Sheet#drawArcmethod, which can let us draw a circle with aught on the inside.
Let's take a look into it 🖌.
          public void drawArc (
            RectF            oval,
            float startAngle,
            bladder sweepAngle,
            boolean useCenter,
            Paint            paint
)
Nice, but what do they mean?
- The
RectF ovalis simply a holder for the coordinates needed to create an "invisible rectangle" in which our oval volition exist contained. This oval is used to define the shape and size of the arc. -
startAngle: is the degree starting betoken from our oval from where we are going to commencement drawing the arc. -
sweepAngle: means how much of the arc is going to be painted from thestartAngleto this angle. -
useCenter: the documentation explains it as, if true, include the center of the oval in the arc, and close it if it is being stroked. This volition depict a wedge. -
pigment: this is the object that provides the information to the cartoon of how it should exist stroked, it's colour, and more.
Drawing the background circumvolve 🎨
Now that we sympathise what nosotros demand in order to draw an arc, let's get to the code.
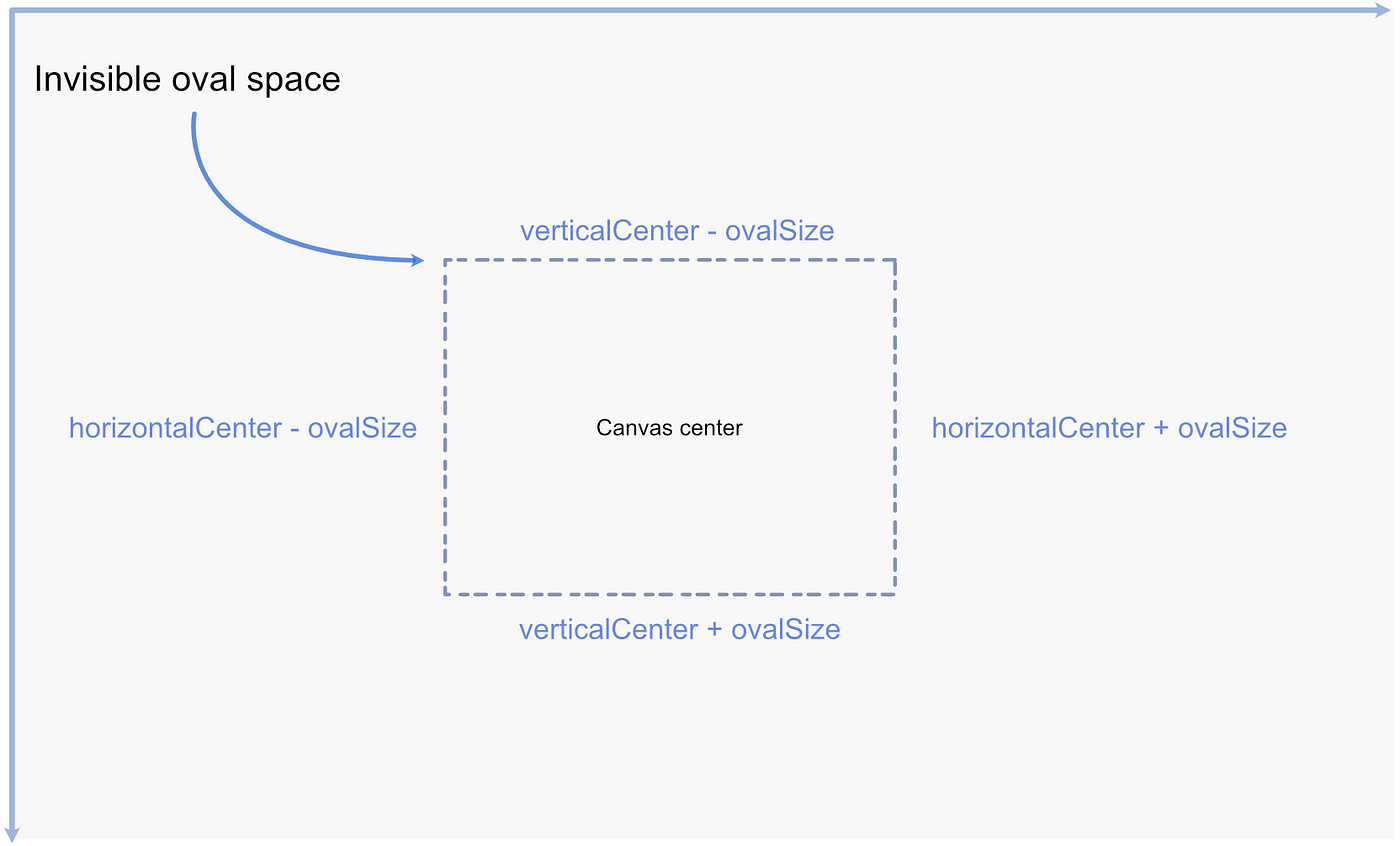
In our view's onDraw method we should create our oval's RectF space with the correct dimensions we want our circle progress to take:
          // ...          private val ovalSpace = RectF()                    override fun onDraw(canvas: Sheet?) {
            setSpace()
                        }individual fun setSpace() {
            val horizontalCenter =            (width.div(two)).toFloat()
            val verticalCenter =            (height.div(two)).toFloat()
            val ovalSize = 200
            ovalSpace.set up(
            horizontalCenter - ovalSize,
            verticalCenter - ovalSize,
            horizontalCenter + ovalSize,
            verticalCenter + ovalSize
            )
}
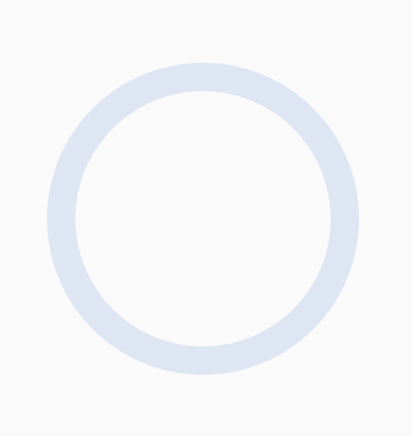
As this won't be painted it would just represent an invisible oval space like the following:
Later we accept our oval space we tin employ the canvas object to draw our arc on it. But in guild to visualize information technology, we need a pigment object to laissez passer the to the drawArc canvas method. Let's create it:
// ... individual val parentArcColor = context?.resources?.getColor(R.color.gray_light, null) ?: Colour.Greynessprivate val parentArcPaint = Pigment().apply {
// ...
style = Paint.Mode.STROKE
isAntiAlias = true
color = parentArcColor
strokeWidth = 40f
}
The paint object arguments are self-explanatory, just a good matter to note is to:
Utilize the
isAntiAliasflag to ensure your drawing has smooth edges.
And let it exist a circle 🎨
          // ...          override fun onDraw(canvas: Canvas?) {
            setSpace()
            canvas?.allow                        {
            it.drawArc(ovalSpace, 0f, 360f, false, parentArcPaint)
                        }
                        }
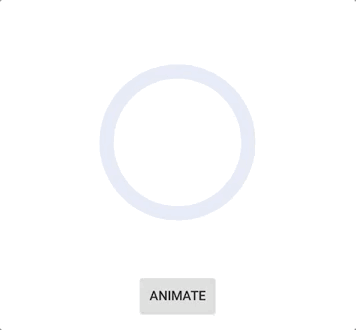
In order to run across anything, we need to make sure our custom view is added to the main activity layout. The name of the custom widget volition exist the proper noun of our class in this example CirculaProgressView.
                      <com.labs.circularprogress.CircularProgressView
            android:id="@+id/progress"
            android:layout_width="match_parent"
            android:layout_height="200dp"
            app:layout_constraintBottom_toBottomOf="parent"
            app:layout_constraintStart_toStartOf="parent"
            app:layout_constraintEnd_toEndOf="parent"
            app:layout_constraintTop_toTopOf="parent"            />
And we will be able to see:
Cartoon the inner circle 🎨
At present that we already know how to draw an arc, this office would be easy, but declare a paint object for it and draw it on our onDraw method. At that place would be a few differences, but I'll exist explaining each of the ones. Allow's see:
          // ...
private val fillArcPaint = Paint().utilise                        {
                        mode            = Pigment.Style.STROKE
            isAntiAlias            = true
            color            = fillArcColor
            strokeWidth            = 40f                      // 1
            strokeCap            = Pigment.Cap.ROUND
            }                    override fun onDraw(canvas: Sail?) {
            setSpace()
            canvas?.permit                        {                                              // ii
                                    drawBackgroundArc(            it            )                                              // 3
            drawInnerArc(            it            )
                        }
                        }                    private fun drawBackgroundArc(it: Canvas) {
            it.drawArc(ovalSpace, 0f, 360f, false, parentArcPaint)
}individual fun drawInnerArc(sail: Sail) {
              // iv
            val percentageToFill = 180f                                    // 5
            sail.drawArc(ovalSpace, 270f, percentageToFill, false, fillArcPaint)
}
Taking a expect at the differences 🧐
-
strokeCap = Pigment.Cap.ROUNDthis would make the edge of the stroke while drawing to look circular instead of flat.
2. We moved the logic to draw the background arc into it's ain functions to improve readability at the onDraw method.
iii. Created another function that will take care of drawing the inner arc.
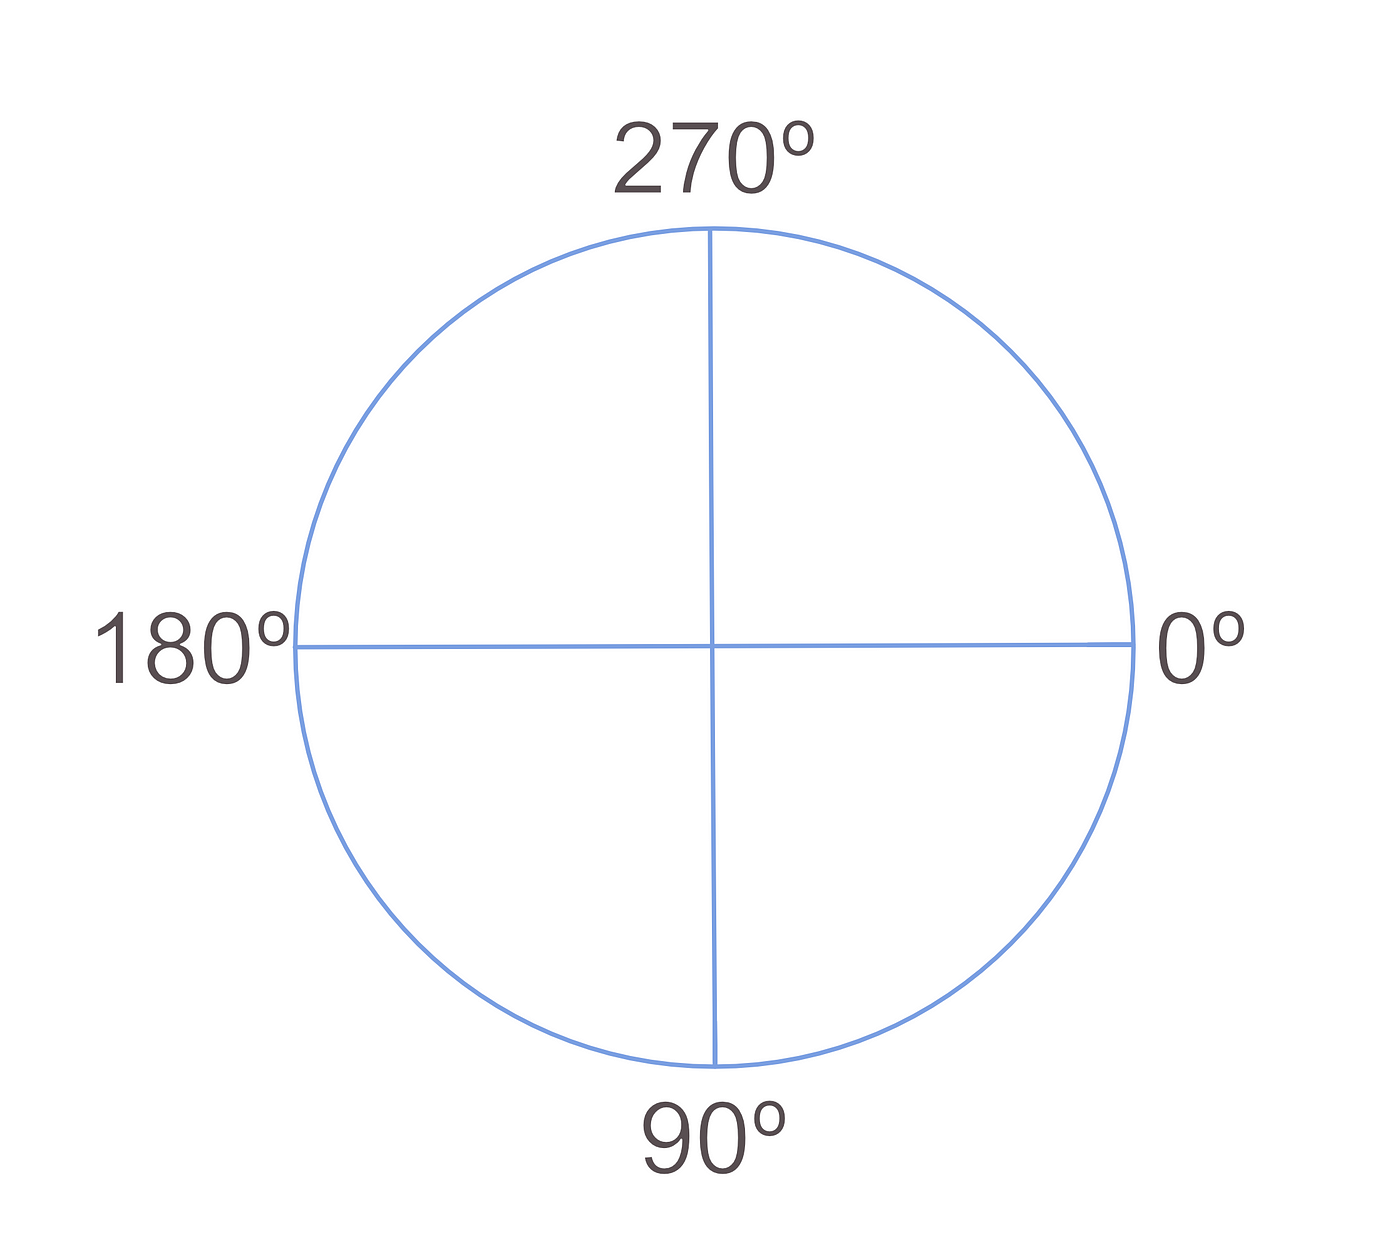
4. Nosotros set the sheet#drawArc sweepAngle parameter to 180f equally right now we only want to draw half of the circle.
5. Here we can notice a 270f value for our startAngle parameter, this is because the bending diagram does non offset equally we use to. The 270f value will set the startAngle at the top every bit you could see in the next image.
Permit'due south start with animations 🚀
Let's practice a tiny recap. In order to be able to draw something, nosotros demand to specify everything that we want to bear witness at our view onDraw office. Like shooting fish in a barrel peasy right? Now… if we want to display something new in our canvas we demand to describe everything we had before and then depict the new affair nosotros want it to appear, in our case this new thing would exist an incrementing arc to show the progress.
To attain this we need a few things:
- A value that indicates the percent of our arc to draw and that nosotros can change dynamically that can be read from our
onDrawfunction - Draw the new value
- And phone call a redraw for our view
- And repeat
Showtime, permit's change our drawInnerArc office to use a dynamic currentPercentage value to make up one's mind the percentage fill to be fatigued:
          private var currentPercentage = 0          //...          private fun drawInnerArc(canvas: Sheet) {
            val percentageToFill = getCurrentPercentageToFill()
            canvass.drawArc(ovalSpace, 270f, percentageToFill, imitation, fillArcPaint)
}private fun getCurrentPercentageToFill()            =
            (ARC_FULL_ROTATION_DEGREE *            (currentPercentage / PERCENTAGE_DIVIDER)).toFloat()
To depict the new value, nosotros have to enquire the view for a redraw and this is washed b calling the view invalidate() method when a redraw is needed.
Now we'll create a part to be called when nosotros want to perform the animation. Hither we utilize Android's ValueAnimatorform to helps us alter the the currentPercentage value through fourth dimension and call our viewinvalidate() on each change, and so it can exist visualized.
The documentation defines the
ValueAnimatorcourse a a simple timing engine for running animations which calculate blithe values and set them on target objects.
In our case, nosotros desire to animate from values 0% to 100%, and this class volition make achieve this animation a slice of cake. And then permit'south accept a look into the lawmaking, a, I'll explain each pace on the go:
fun animateProgress() {
// 1
val valuesHolder = PropertyValuesHolder.ofFloat(
PERCENTAGE_VALUE_HOLDER,
0f,
100f
)
// 2
val animator = ValueAnimator().utilize {
setValues(valuesHolder)
elapsing = g
interpolator = AccelerateDecelerateInterpolator()
// three
addUpdateListener { // four
val pct = information technology.getAnimatedValue(PERCENTAGE_VALUE_HOLDER) as Bladder// v
// 7
currentPercentage = percentage.toInt()// 6
invalidate()
}
}
animator.starting time()
} companion object {
// ...
const val PERCENTAGE_VALUE_HOLDER = "percentage"
}
- We create a
PropertyValuesHolderinstance for belongings the values that we want to animate. In this example, nosotros will animate from 0 to 100 percent. In order to create this instance we likewise demand to pass apropertyNamethat we will use afterward to take hold of the current animated value from the animator. - Here nosotros create an instance of
ValueAnimator, we set up the property values alleged before and as well pass how much fourth dimension in milliseconds we want the animation to last. - This will be called on every frame of the animation, providing us with the calculated percent value for a specific frame. This value will be used to update the
currentPercentageblitheness later on. - We get the current animation value
(animatedValue)from ourupdateListenerusing thepropertyNamealleged earlier. - Update the
currentPercentagevariable that is used to describe our inner arc on eachonDrawtelephone call. - Now we call for a view redraw after nosotros already updated the value.
- Nosotros run our animation.
Note: This animation volition outset only when the office
animateProgressbecome called.
In order to trigger our new blitheness, we'll need to add a Button to our activity layout in gild to perform start it when clicking the button.
                      // ...                                                          <Button
            android:id="@+id/animateButton"
            android:layout_width="wrap_content"
            android:layout_height="wrap_content"
            android:text="animate"
            app:layout_constraintEnd_toEndOf="parent"
            app:layout_constraintStart_toStartOf="parent"
            app:layout_constraintTop_toBottomOf="@+id/progress"            />                                // ...
And add a clickListener on our Activity class:
          animateButton.setOnClickListener            {
            progress.animateProgress()
                        }
And there you go!
Y'all can discover the full code here.
Hope you enjoyed this mail service, you can follow me on twitter @paulnunezm where I normally tweet nigh Android Dev. And permit please let me know what you think in the annotate section bellow.
Source: https://medium.com/@paulnunezm/canvas-animations-simple-circle-progress-view-on-android-8309900ab8ed
Post a Comment for "Draw Percentage Circle in Android"